WebSphere安装
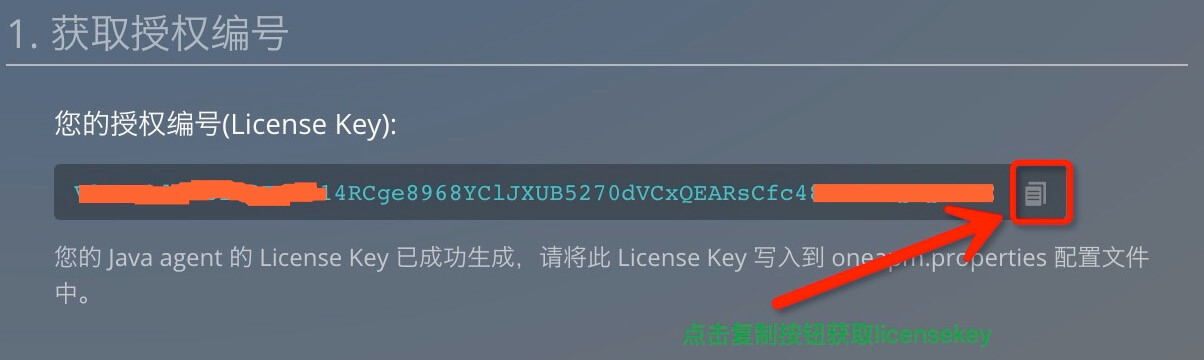
1. 获取授权编号
- License Key 获取
2. 下载
下载 Agent
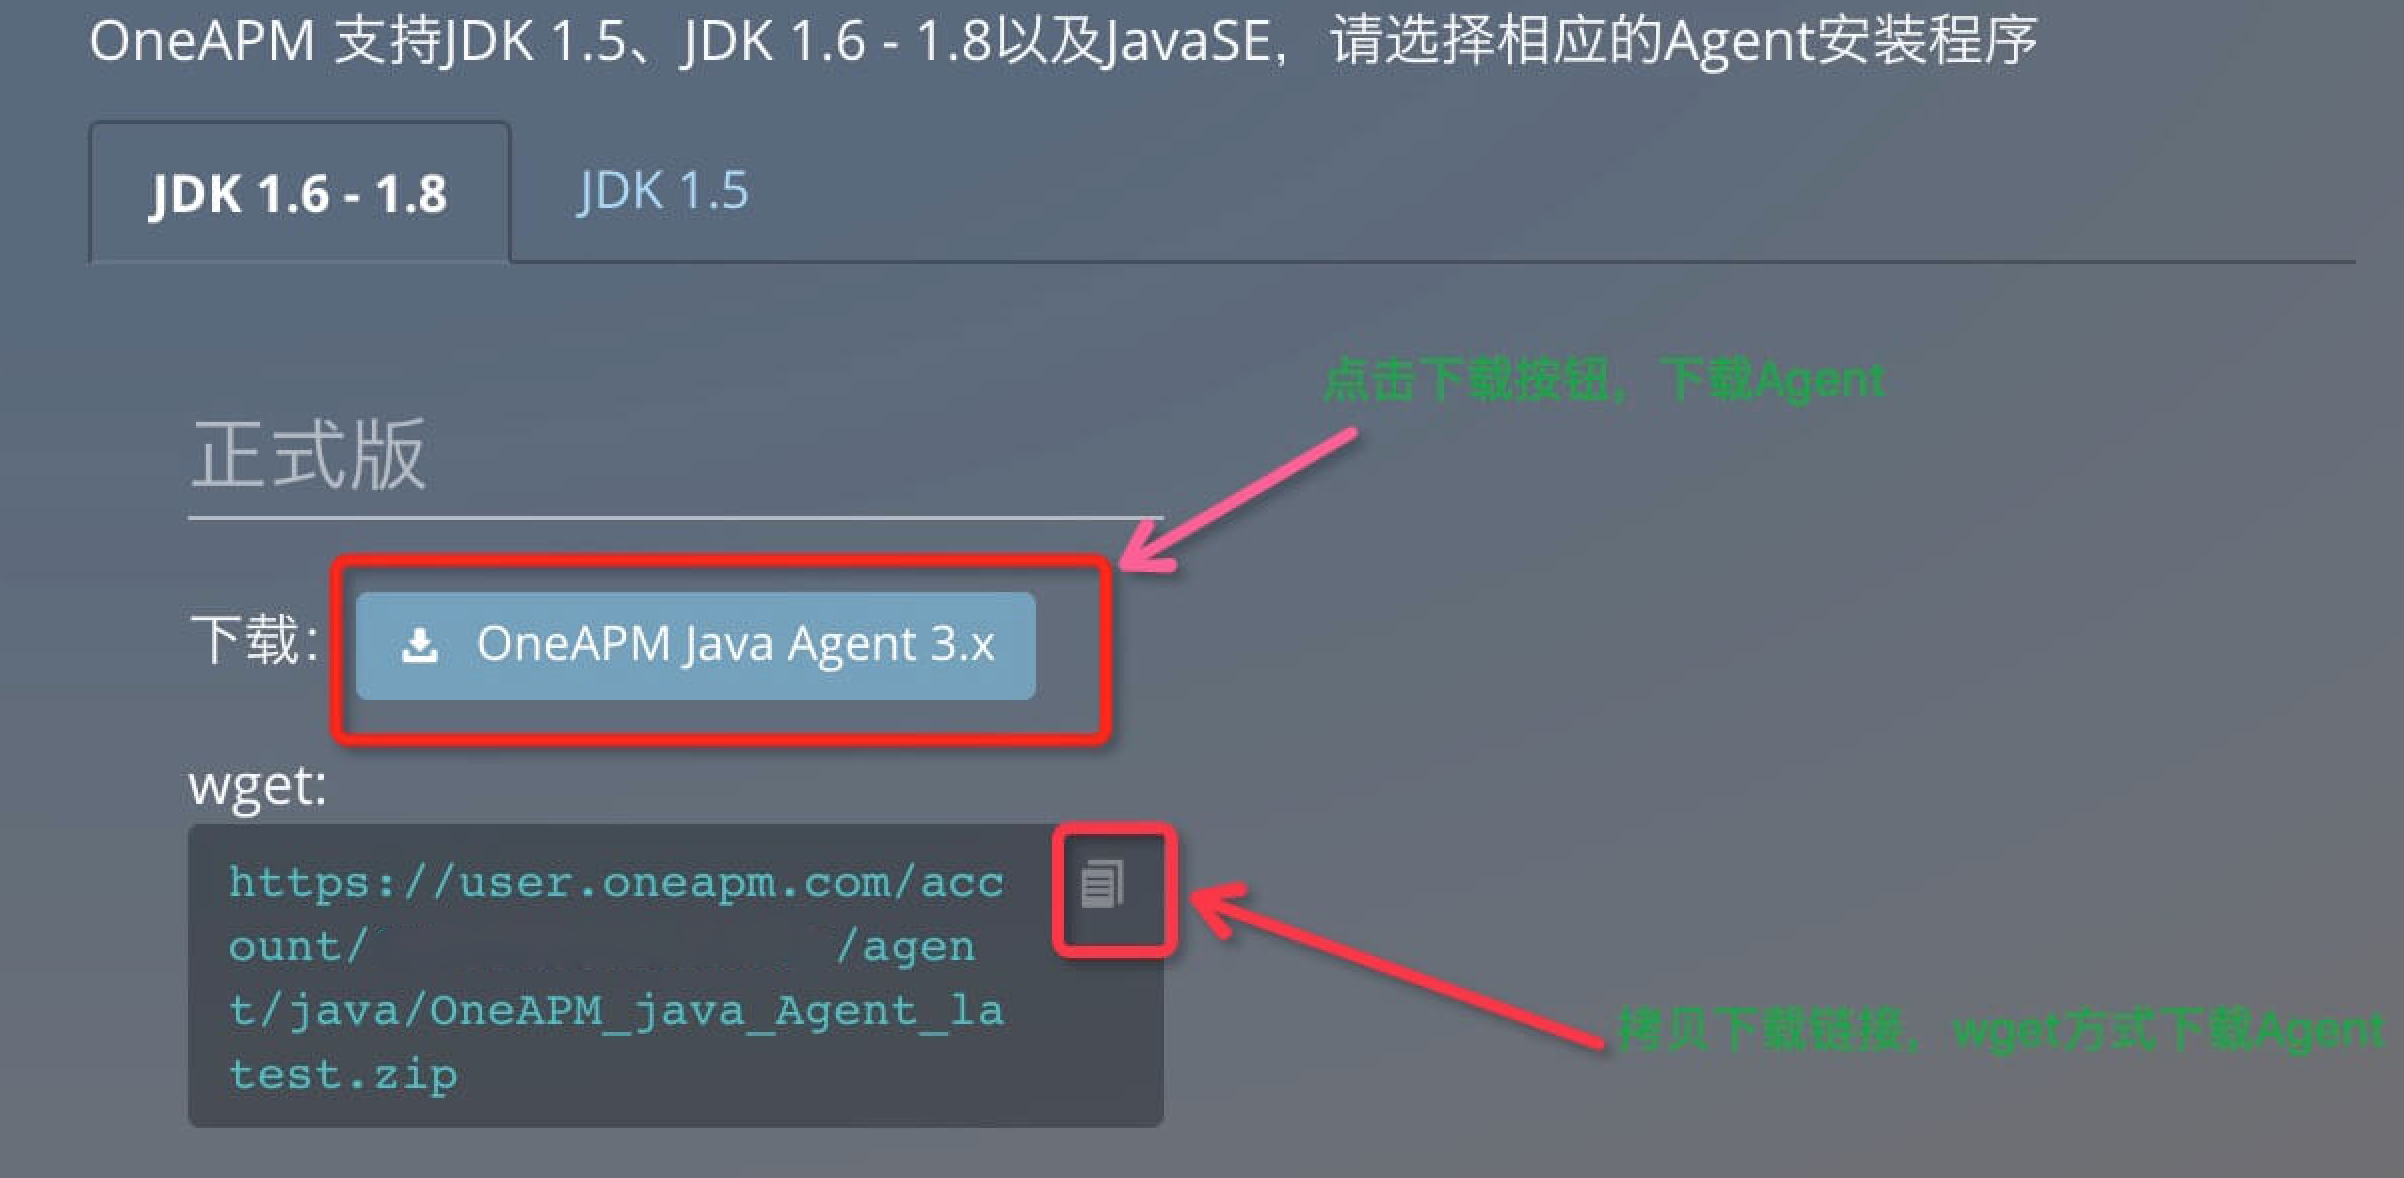
JDK 1.6 - 1.8 请下载
wget: https://user.oneapm.com/account/5dad74ffe945c060/agent/java/OneAPM_java_Agent_latest.zip
- JDK 1.5 请下载
wget:https://user.oneapm.com/account/5dad74ffe945c060/agent/java/OneAPM_java_Agent_legacy.zip
3. 安装
- 解压「Agent」至「WebSphere 的根目录」下
 unzip OneAPM_java_Agent_latest.zip -d
 <Application Server Path>/
写入「License Key」至配置文件「OneAPM/oneapm.properties」
模板如下:

注意 license_key 配置的时候不能有引号
WebSphere 应用服务器 Java Agent 安装步骤:
登陆到 WebSphere 的 admin console.
在左侧的导航栏中选择 Servers > Application servers.
在 server 列表中选择要监控的 server.
在 the Application servers Configuration
标签中,选择 Java and Process Management > Process Definition.
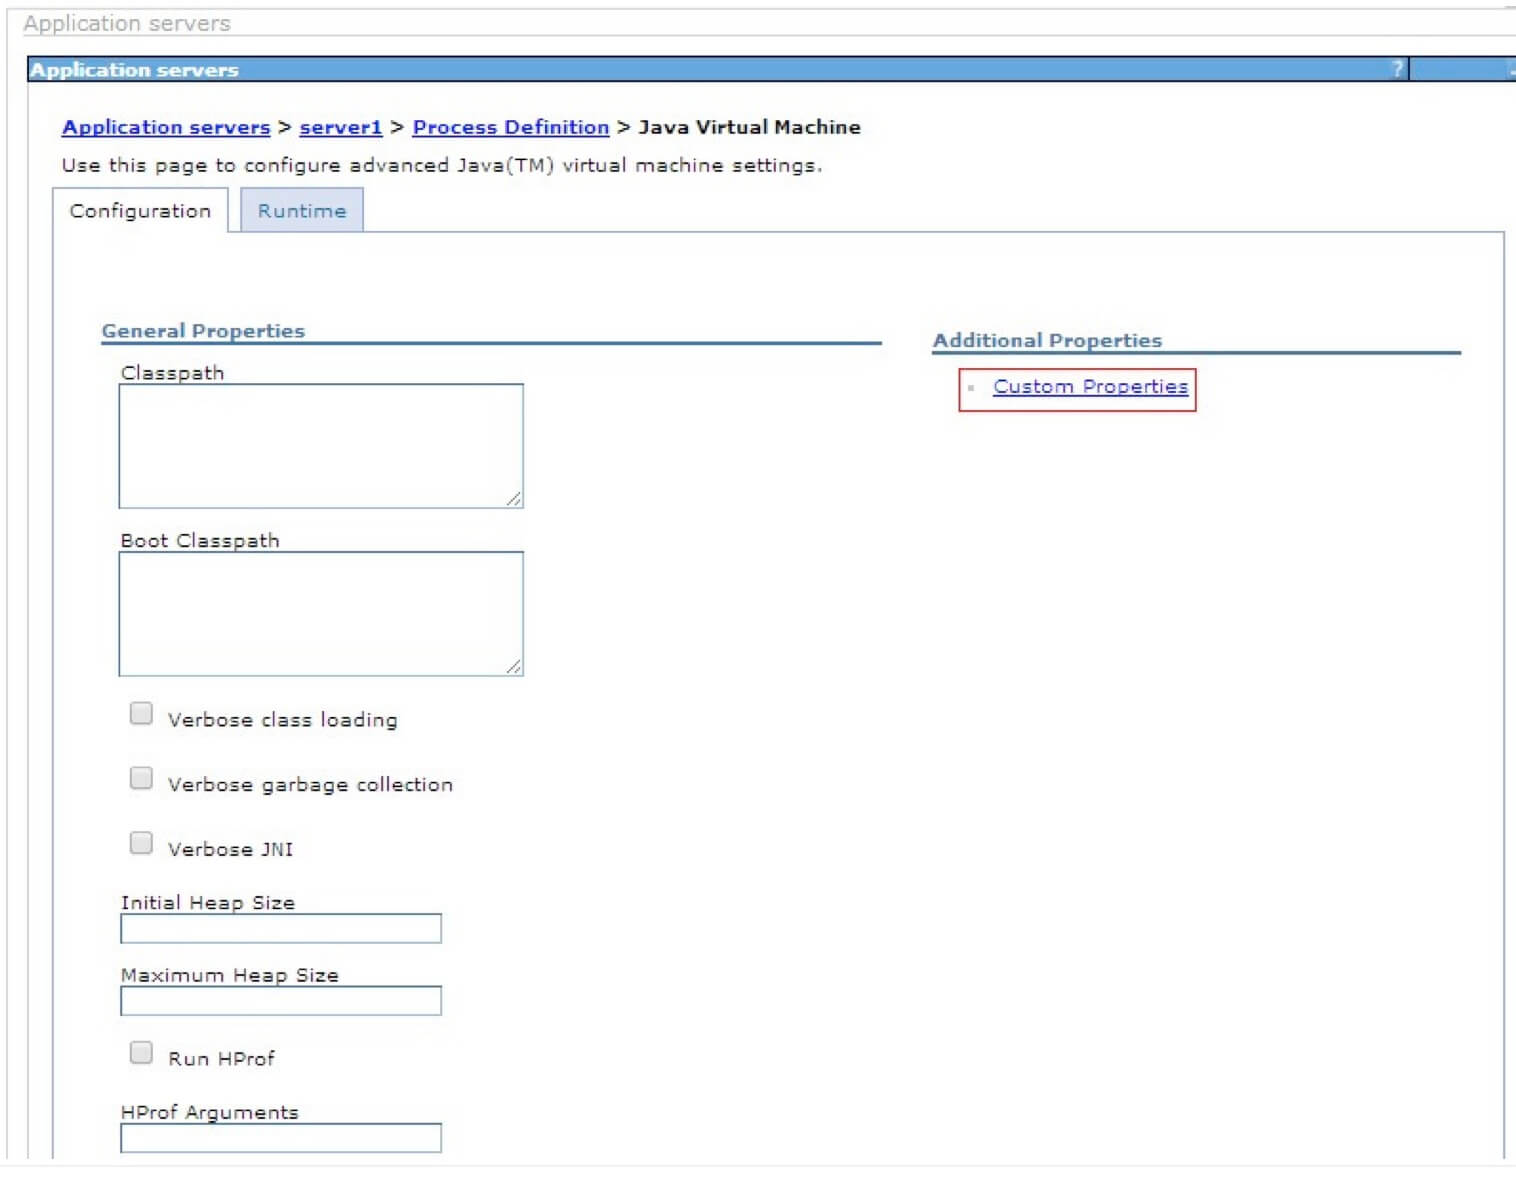
在 Process definition 页面中,选择 Java Virtual Machine.
如果您使用 Linux 操作系统:
- 在 Java Virtual Machine 页面,在 Generic JVM arguments 文本框中,添加
-javaagent:/full/path/to/oneapm.jar
- 注意:-javaagent: 后面跟 oneapm.jar 的绝对路径
如果您使用 Windows 操作系统:

第一步:点击 Additinal Properties 下方的 Custom Properties
第二步:点击 Preference 下方的 New 按钮

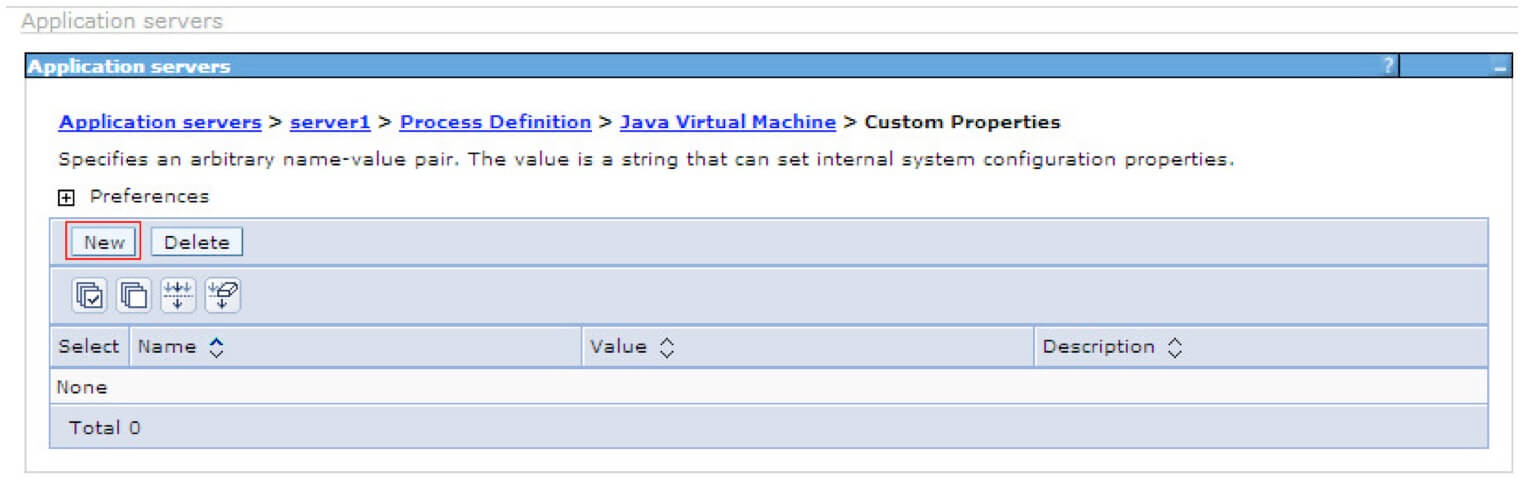
第三步:在 Configuration 中配置 Name
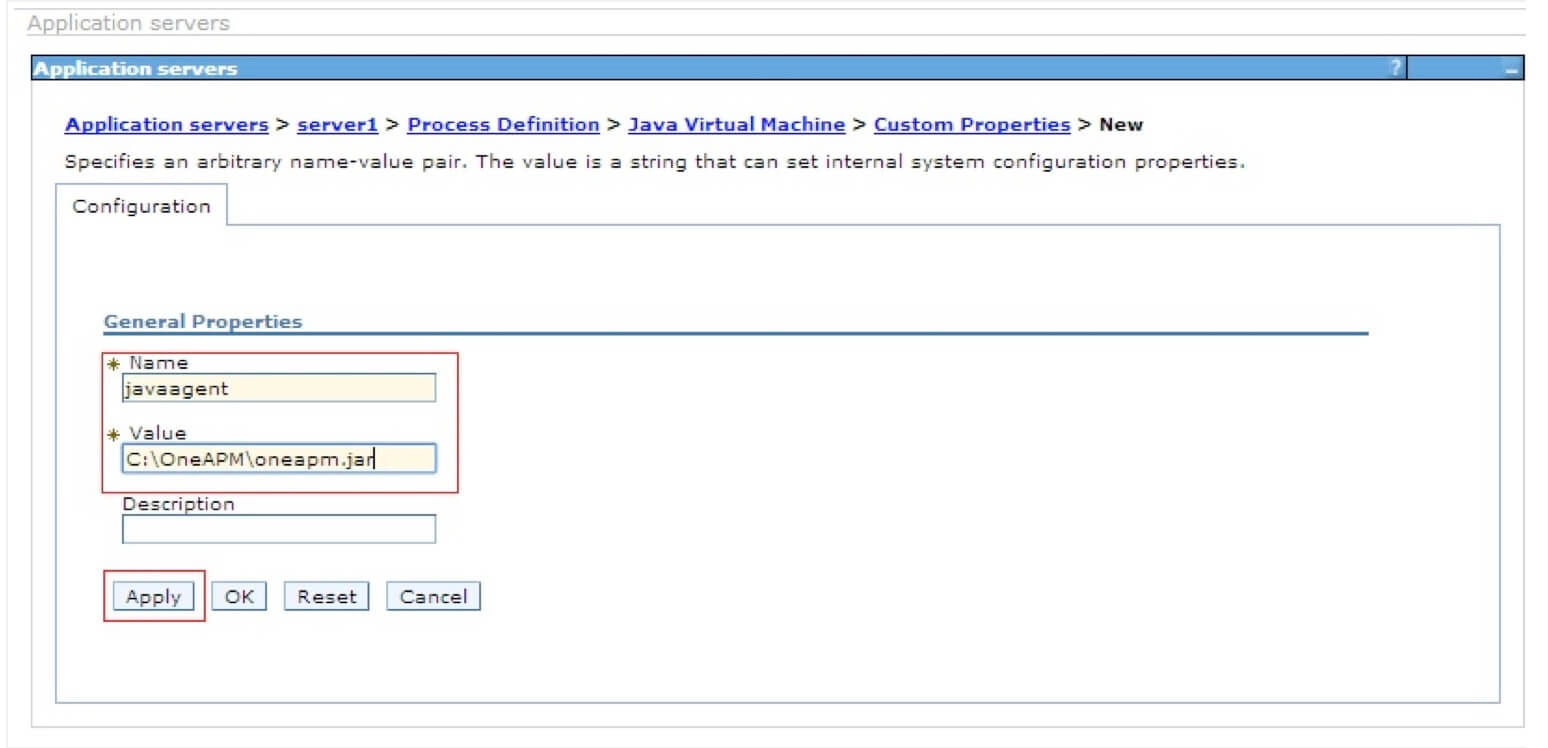
javaagent 和 Value 下方配置 C:\OneAPM\oneapm.jar 点击 Apply 点击 Save 重启服务器 Servers > Application servers > Java and Process Management > Process Definition > Additional Properties > Java Virtual Machine: 通用 JVM 参数处加上:-javaagent:path/oneapm.jar,重启服务器